
Record your video against a green or solid-coloured background, then replace it with an image or video of your choice using our background editor.
Whether you’re a newscaster, vlogger, or video content creator, use the green screen video editor to turn an otherwise boring video into a show-stopper.

Customize any background to meet your needs and requirements in a few clicks. Have your background simulate any location to make your video more entertaining and engaging.
Keevi lets you carry out green screen editing professionally. You can upload a video in any file type or download it in a file type of your choice.
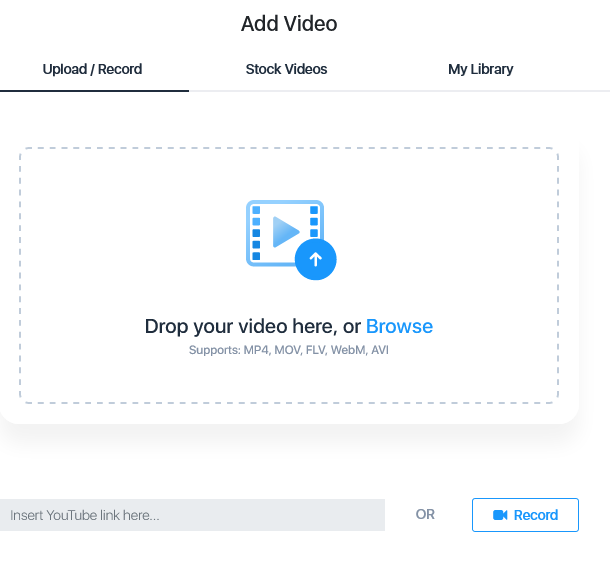
Upload the video you’ve recorded in front of a green screen.
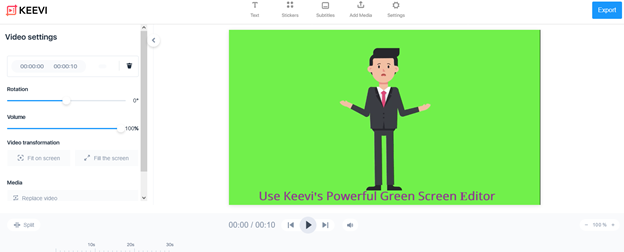
Keevi’s background editor will add the video to the timeline.
Under video settings, enable Chroma Key. It will remove the green background, leaving a blank canvas with your subject on it.
Adjust sensitivity to ensure the green screen is properly removed.
You can add another video to act as the new background. The main video will be at the front with the added video at the back.
There is also the option to add a picture to act as the new background.
Drag the edges of the picture to adjust its length and width until it properly fits the canvas. Right-click on the picture, select Bring to Back.
Tweak the lighting, contrast, and other effects and filters to improve your video and make it appear natural.
At the top menu, you can add elements like:
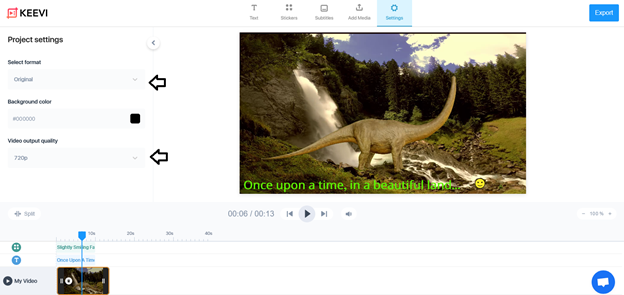
Change the aspect ratio for social media. Keevi provides preset aspect ratios for all popular social networks.
You can also change the video output quality as you see fit.
Hit play on the media player. If you’re happy with your edits, hit export.
Choose the render quality and file type for your video output. Our green screen video editor will have your video ready in about a minute.
Share the video on social media or download it on your PC.

For the green screen video editor to work effectively, the background needs to be in a colour that’s not used anywhere else in the video shoot, including the subject’s skin, hair, and accessories. Green is ideal because it’s not present in the human skin tone. But you can also use a blue screen—blue is also not present in the human skin tone. However, blue is much more common in clothing and this can be problematic when making your edits.
With so many green screen editing apps available in the market, picking the right tool to edit our video can be tough. Here are some considerations:
Additional editing capabilities.Likely, that removing the green screen is not the only change you want to make to your video. Go for a green screen video editor that lets you make other edits, such as adding text, subtitles, audio, adjusting the aspect ratio, and any other adjustments you might need to make.
You don’t need to have a green screen to remove the background in your video using Keevi. Simply upload your video. Under Video Settings, click Remove Background. Adjust the threshold to remove the background to perfection. Upload the video or image you want to use as your new background. Click Export.
Here are a few pointers to have a professional video.
Dressing code:
Avoiding Green screen spills:
Green screen spills is a situation where a green cloud is cast over the subject. It makes the subject look vaguely green, which could be off-putting to your audience.
Avoid green screen spills by:
Making the video shoot:
About 77% of 15–35 year-olds in the U.S. use YouTube, proof of this age groups’ love for videos.
Data also shows that the number one reason consumers watch video content is to "relax and unwind”. The seventh reason was that videos make them forget about the world around them.
Location is important in creating a video that satisfies these needs in your audience.
By using a green screen, you can use the chroma key video editor to change the surroundings of your video with a click.
Whether you want the subject of your video to be on a tropical beach soaking in the sunshine, or a forest getting chased by mongooses, you can achieve it with Keevi’s greenscreen video editor.
Use a green screen to create informative marketing videos for your leads. You can produce entertaining product videos and company videos. You can market a new application or software by having the subject explain it while it runs in the background.
And the best part is that it doesn’t have to cost a fortune. Improve the background in a few clicks using Keevi.
If you’re a vlogger, use the green screen to have unique backgrounds in your videos that’ll keep the viewer engaged.
The rich text element allows you to create and format headings, paragraphs, blockquotes, images, and video all in one place instead of having to add and format them individually. Just double-click and easily create content.
A rich text element can be used with static or dynamic content. For static content, just drop it into any page and begin editing. For dynamic content, add a rich text field to any collection and then connect a rich text element to that field in the settings panel. Voila!
Headings, paragraphs, blockquotes, figures, images, and figure captions can all be styled after a class is added to the rich text element using the "When inside of" nested selector system.
The GIF Captioner is not the only tool Keevi has to offer. You can spice up your content by using Keevi to:
