
Edit and share videos with our easy-to-use online video splitting software with just a few clicks.
Keevi Video Splitter is a versatile multimedia app dedicated to helping you save time and create stunning videos for every occasion in minutes.
With our online tool, everyone can become a master video editor and easily cut up large video files into smaller clips without ruining the original video quality.
This video splitter is the fastest and most convenient way to split and merge videos in diverse formats. It works on both Windows and Mac and has an intuitive interface that you can easily get a hang of.
Our drag-and-drop editor makes uploading your files a breeze. You can trim or remove unwanted segments from videos and join the parts you want to keep to create powerful stories that resonate and move people.
Add text, music, colors, and your own personal touch to each video with our easy customization tools.
Keevi Video Splitter is a great tool for both newbies and people with considerable video editing experience. Splitting a large video file only takes a few minutes. Simply select a start and end time and leave the rest to us.
Whether you want to split your video to meet the restrictions of social media platforms or to erase specific scenes, you can get the task done with our handy video file splitter.
Not only is our video splitter free to use, we do not add any watermarks to your exported video. Your content is all yours!

You can use Keevi Video Splitter to:
Split video into multiple parts
You can shorten the length of your video by slicing it into multiple parts of equal or varying lengths and rearranging the footage in a new sequence to tell a better story.
Auto subtitle your video
Make your videos more accessible and easier to watch by adding subtitles. Keevi's powerful subtitle feature allows you to automatically generate subtitles for your files in multiple languages. You can download the generated subtitles, upload external subtitle files, edit & format subtitles, or translate subtitles into a different language.
Add text to video
Create special texts for your videos and customize their color, font, size, and placement however you like.
Crop video
You can get rid of distracting parts, remove black bars, boost image composition, highlight specific angles, and zoom in on any part of your video by using the crop feature.
Add animations
Apply animations to your videos to make them more engaging or remove unwanted animations from your media file.
Trim video
Cut away useless or unwanted segments from your media without affecting video quality. Adjust the playback speed to make clips appear shorter without removing a portion of the video. Or resize videos to meet the requirement of different social media formats.
Merge multiple clips
Join several video files together with perfect accuracy and no quality loss. It doesn't matter if the files are from different devices or in different formats, we'll help you combine them into one file anyway.
Add stickers, images, and GIFs
Make your videos more fun by adding stickers and GiFs. You can insert or extract images from your files, or even resize and rotate them to suit your desired aesthetic.
Remove sounds or add music
Get rid of any unwanted background noise. Add music to your videos by selecting from our audio library or uploading/generating your own. You can even adjust the length of the audio track.
Is your video file too long or too large to be shared on your intended platform? Don’t worry. Simply split it into smaller pieces with our tool.
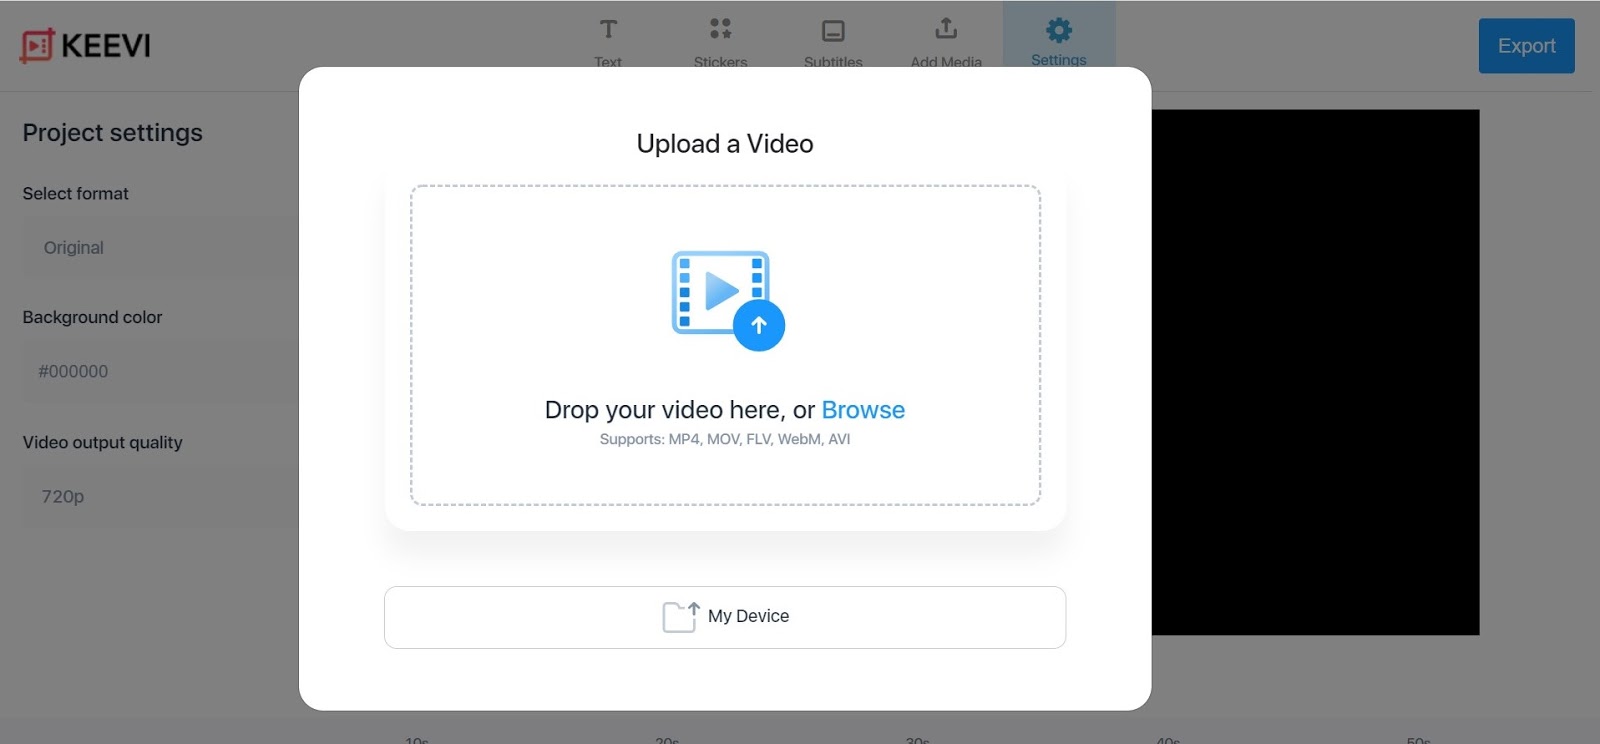
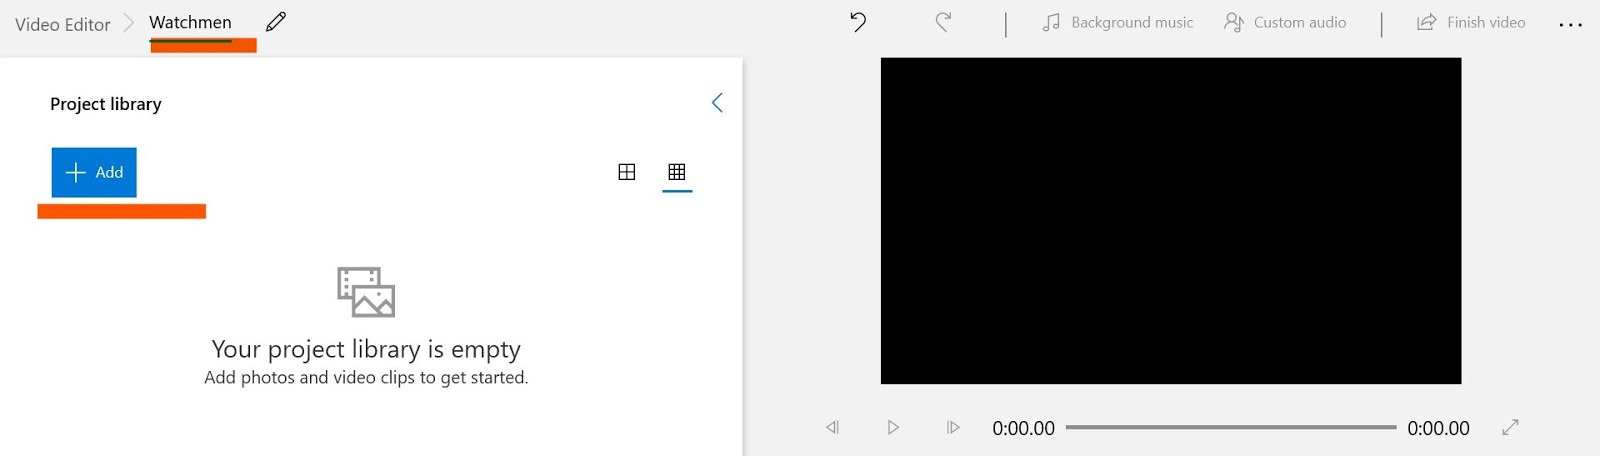
Open your browser and visit Keevi's video splitter page. Click on Get Started for Free to begin using the software. No need for download and installation.
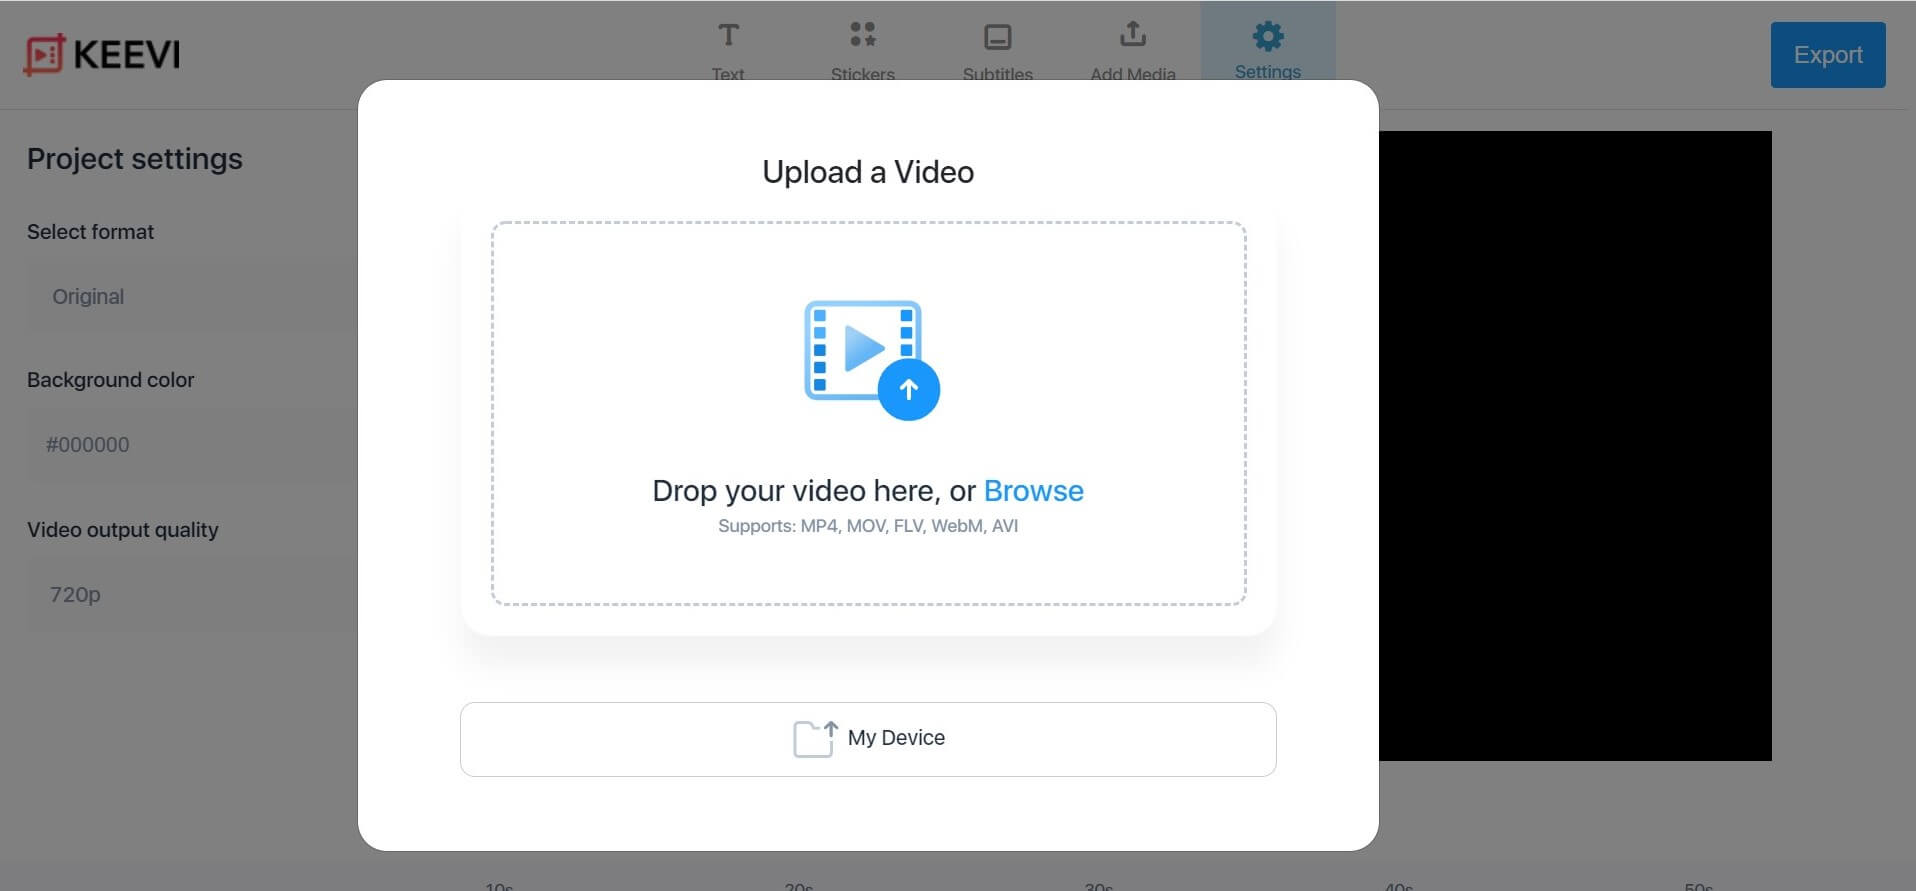
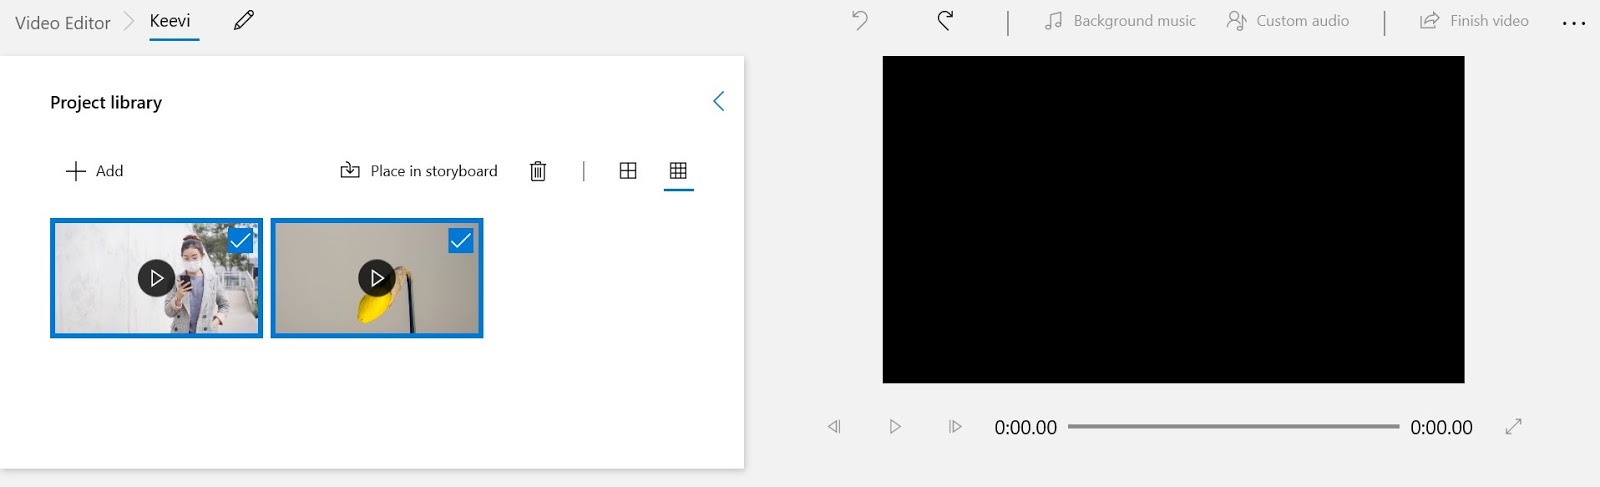
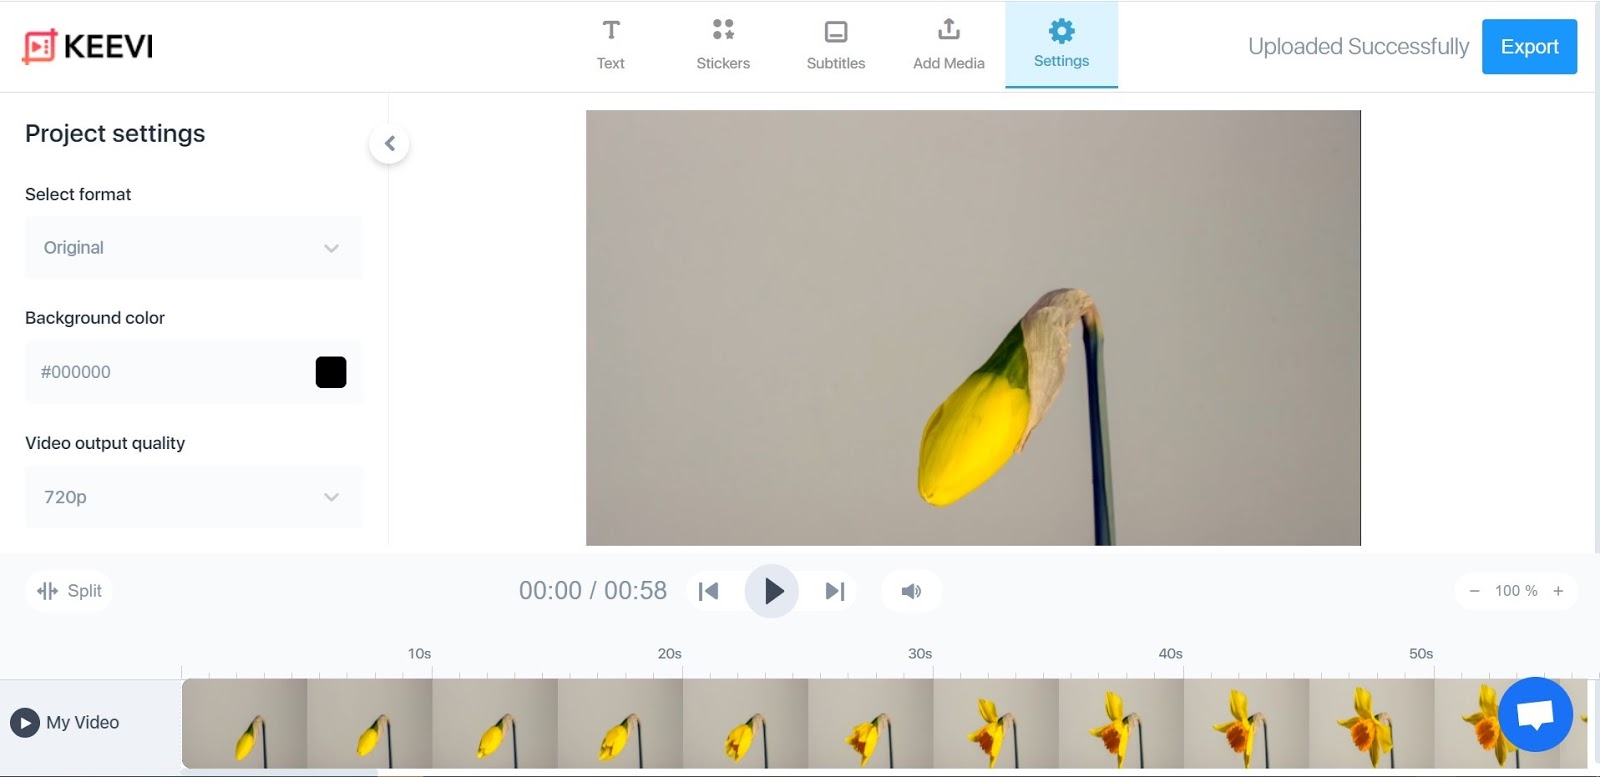
Browse through your device to find and select the video you want to split or simply drag and drop it in the box to open the file with the program. Then wait a few seconds for it to upload completely before you begin the process.
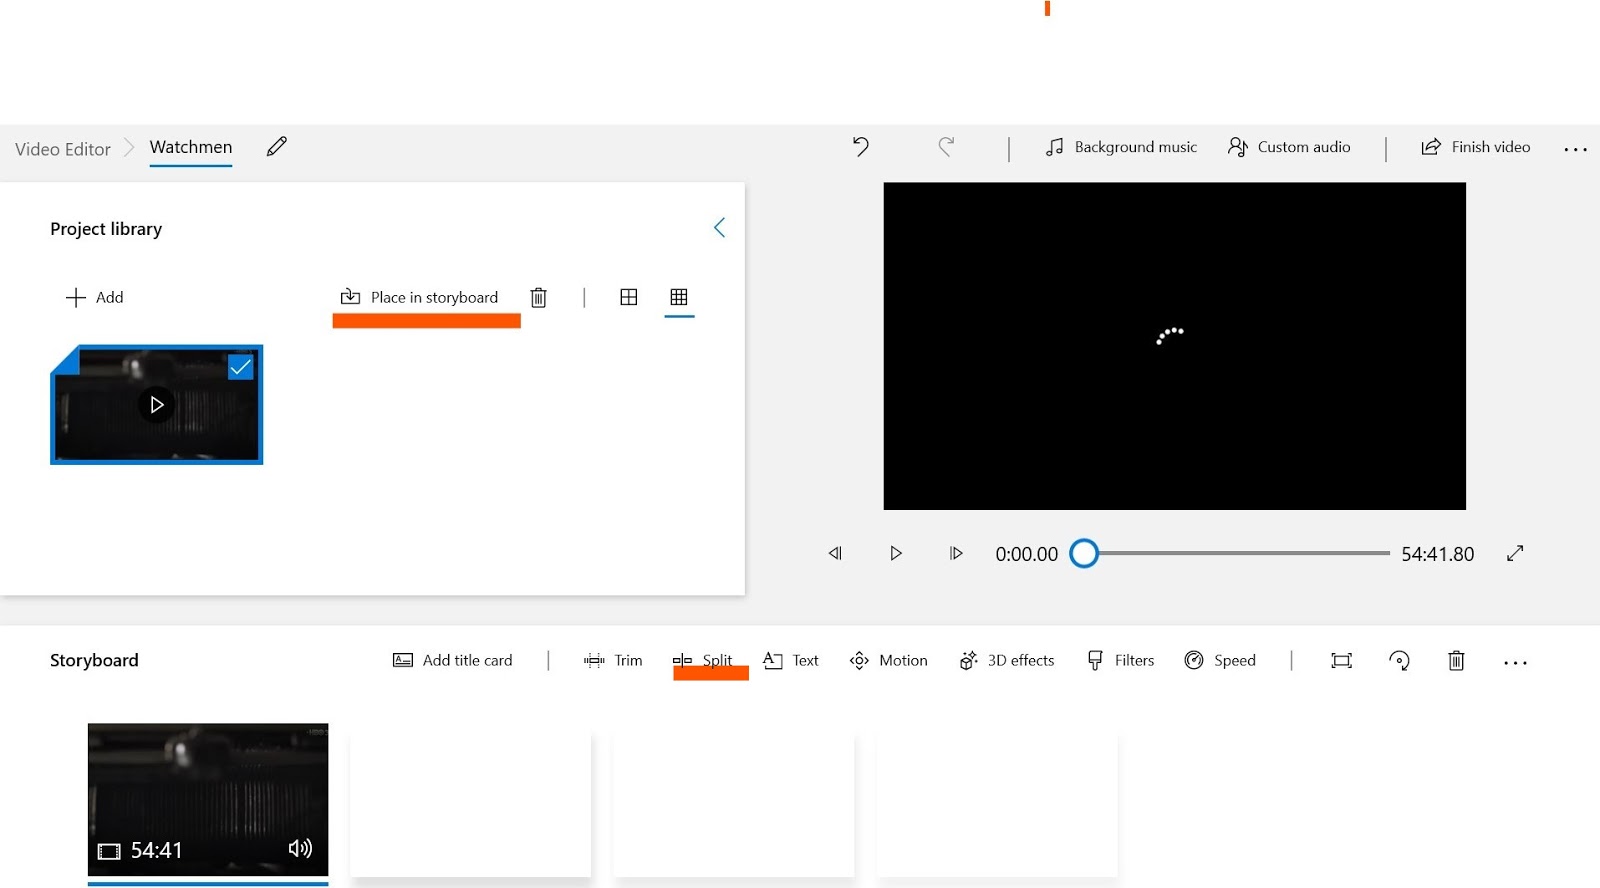
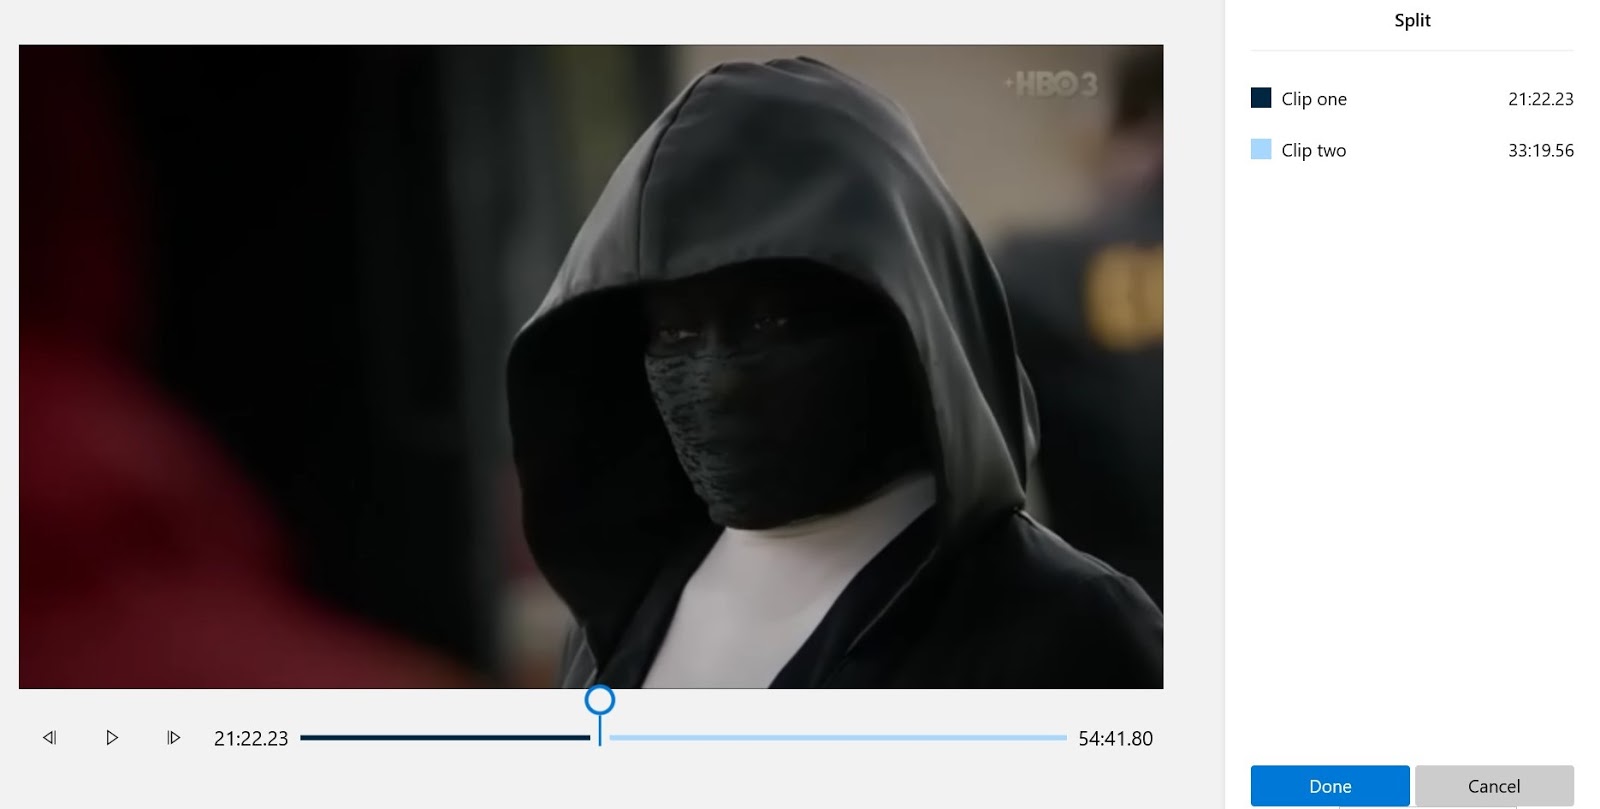
Move the blue arrowhead to the point you want to start cutting from and click Split. You’ll notice this sign || that would appear to mark the start point. Continue playing the video until you get to the end of the section you want to cut out, then click Split again. Another || sign will mark the spot.


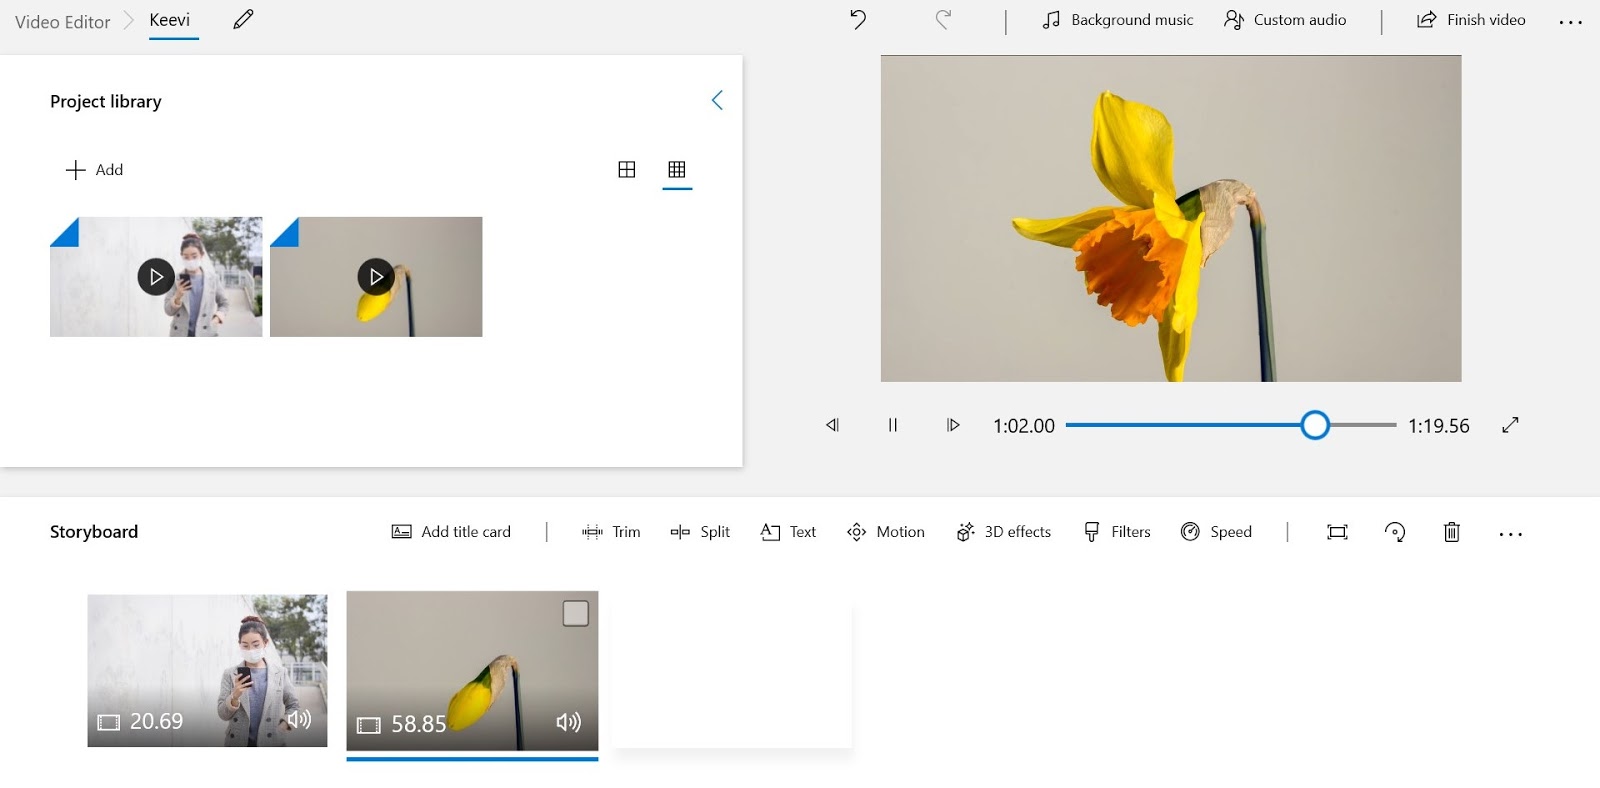
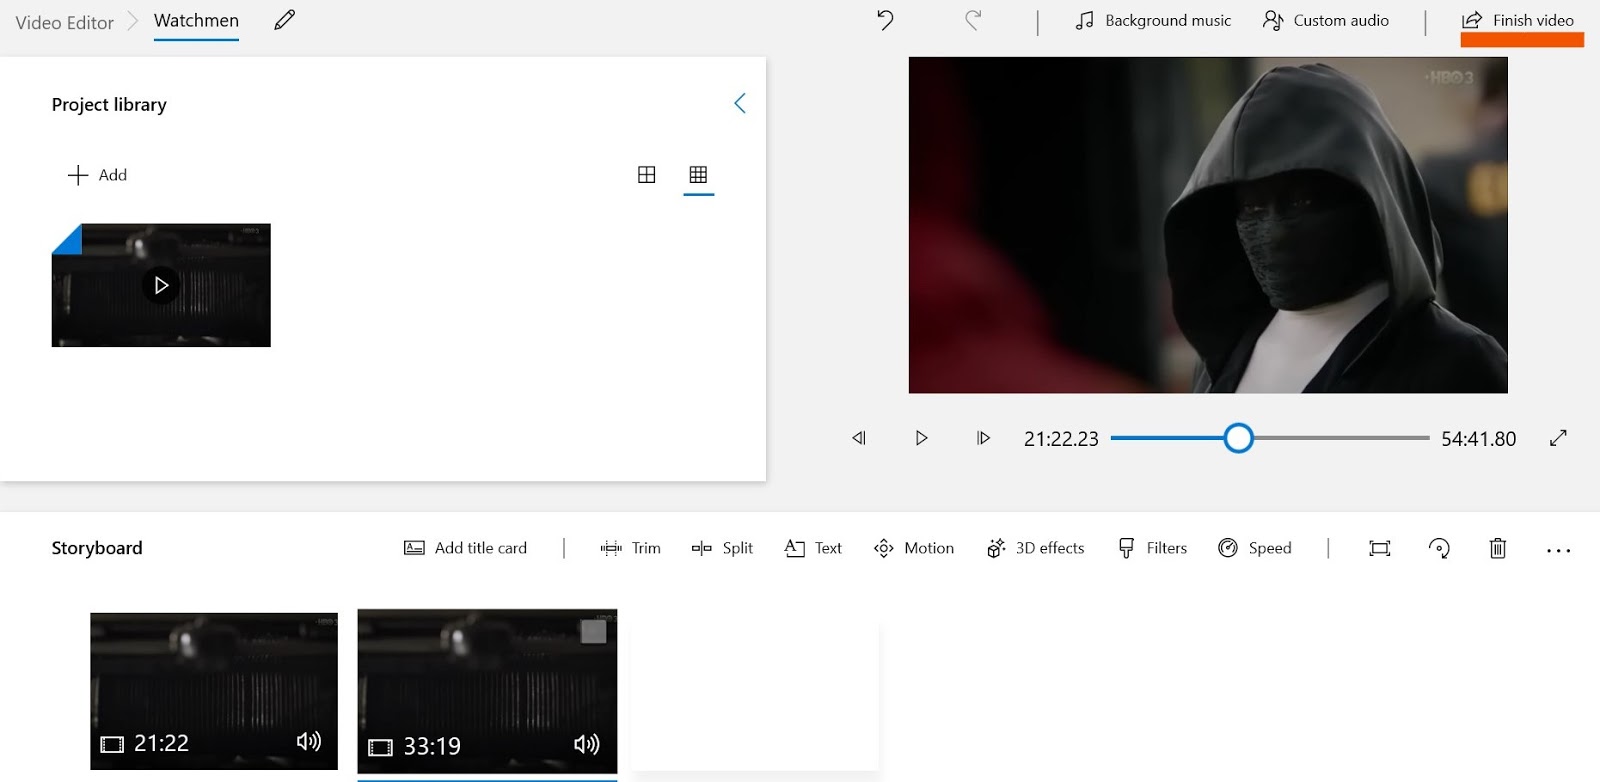
Delete the portion of the clip you don't need by clicking the bin icon or move the parts you want to keep closer to each other until they merge.
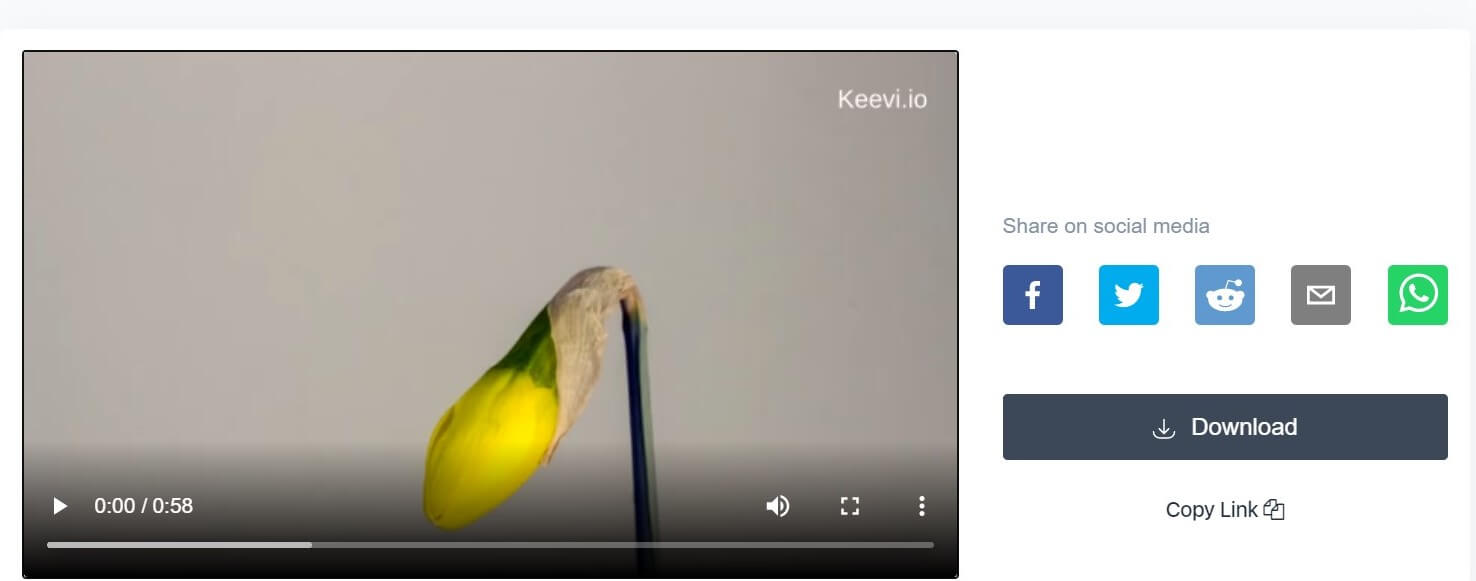
Review your edits to make sure you've made the exact changes you want, then hit Export to save your split video files. Wait for the video to render completely, then download it, share directly on social media, or copy the link and share wherever you want.

A video splitter is an application or software that allows you to cut a video file into multiple parts, rearrange scenes, and merge different clips to focus on the most relevant footage. These tools make it easy for you to handle large videos and turn them into bite-sized clips that suit your purpose and can be easily shared on social platforms.
A. Save time creating content
Our tool makes it fast and easy for you to finish your projects, which means you can put out more content that serves your audience in less time.
B. Easy to master tool
Keevi's simple interface makes it easy to use, so you can begin cutting your videos into parts within minutes.
C. Great video quality
Quickly edit and reduce the length and size of your videos without sacrificing original video quality using Keevi's free video splitter.
D. Diverse video formats
The more the merrier. Some video dividers only accept a few specific formats, but not ours. Keevi's video files splitter supports a wide array of video formats without you having to download additional codecs.
E. Safe and secure
Your media files are processed directly in your browser window and are not uploaded to a server. So you never have to worry about other people stealing or snooping on your work.
Say goodbye to editor apps that you constantly have to update manually or wait for their annoying bugs to be fixed. Our software is always up-to-date so you can just focus on your work.
Your data, your control
After you're done working on your projects, they're immediately deleted from our servers. You alone will have access to your videos.
Extensive features
Our tool is designed to help you accomplish multiple video editing tasks without having to use more than one software.
Contains no adware
You will not have to put up with pesky ads while using Keevi Video Splitter.
Completely free
Our video splitter software is free. You don't have to dip into your pockets to purchase a license or pay for additional features.
Splitting a video file into two or more fragments and removing unwanted parts is very easy. All you need is the Keevi Video Splitter.
It enables you to cut large and small videos quickly without losing the original quality. To get started, follow these steps:
Most media players don't come with splitting or streaming features, but VLC isn't most media players. The free, open-source software can be used to split your video files into smaller pieces. Here's how:
Step 1: Download and install VLC Media Player
VLC is not an online tool, so you need to install it on your device. It works with every operating system and will load most video formats.
Step 2: Set up the program
Click the View tab at the top of the menu bar, then scroll down the menu and select Advanced Controls. A recording bar will appear at the top of the normal control buttons.
Step 3: Select the video to be split
Click on My Videos to select a file from your video library or click on Media and select Open File/Open Folder to find the location of your video and open it. You can also drag and drop the file.
Step 4: Chose the split points
Select the point you want to start the split from by dragging the slider to that section and hitting pause. You can use the time counter for precise accuracy.
Step 5: Start recording
Click on the Red button in the control toolbar to start splitting your video from the desired point.
Step 6: Press play
Resume playing your video until you get to the point where you want the split to end. Click the Red record button again to stop the process and automatically save your split file.
Step 7: Exit the program
You can simply close the page or click on the Media tab from the main menu, scroll down, and select Quit. Then go to your default videos folder to find your split video. The file's name will start with "vlc-record".
With the Keevi Video Splitter, you don't need to download any applications to cut your MP4 videos. Our tool supports diverse video formats including MP4, which allows you to create high-quality videos that take up relatively little storage space.
All you have to do is:
That's it! You now have a smaller clip to work with and share across social media or with friends, family, and colleagues.
If you want an offline solution, you can download and install MiniTool MovieMaker and follow the procedure explained above.
If you find the background in your video boring or you think it's doing too much or doesn't fit, you can easily edit it with a video editor.
Unscreen is a good online tool that's designed to help you remove and change your video background in a few simple steps. You don't have to go through the trouble of downloading and installing the software, signing up, learning how to use it, and jumping through hoops to get the task done.
Like Keevi, the Unscreen video background editor is browser-based with an intuitive interface that takes seconds to figure out.
You only need to:
Pro tip → Video background in primary colors of blue, red, or green, are much easier to change. So if you want to change the background without running into issues, make sure to shoot your videos with a single, primary color background. Secondary and tertiary color backgrounds tend to be hard to change.
Sometimes, you might need to join two or more clips together to create a new video. While this can be a tad confusing depending on the software you're using, it doesn't have to be.
With Keevi, after splitting you can merge your video very easily and without any professional assistance or know-how.
To merge your video with Keevi, simply follow these steps:


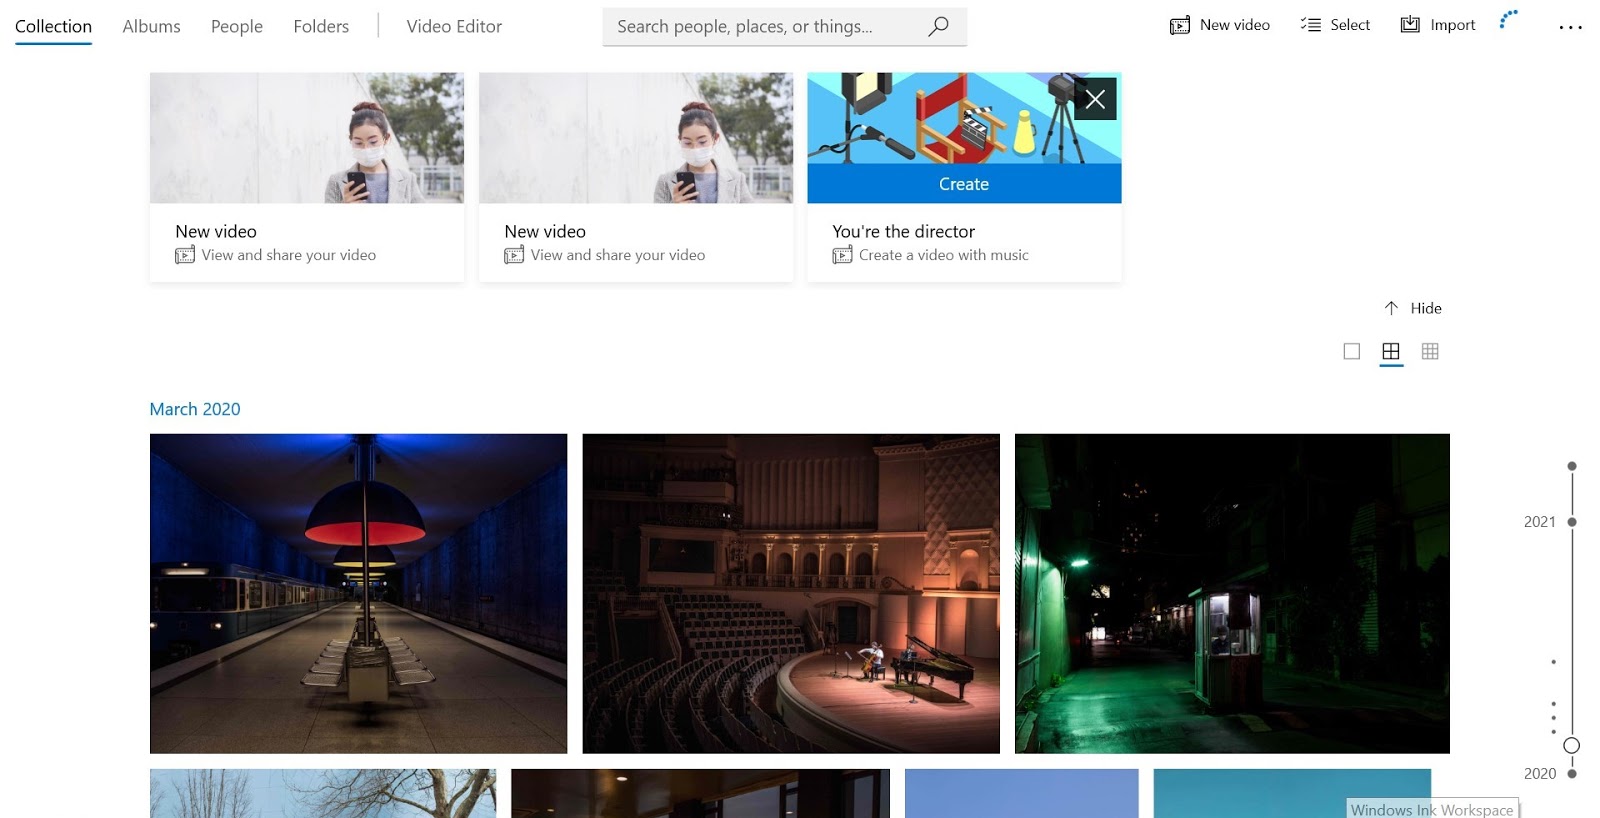
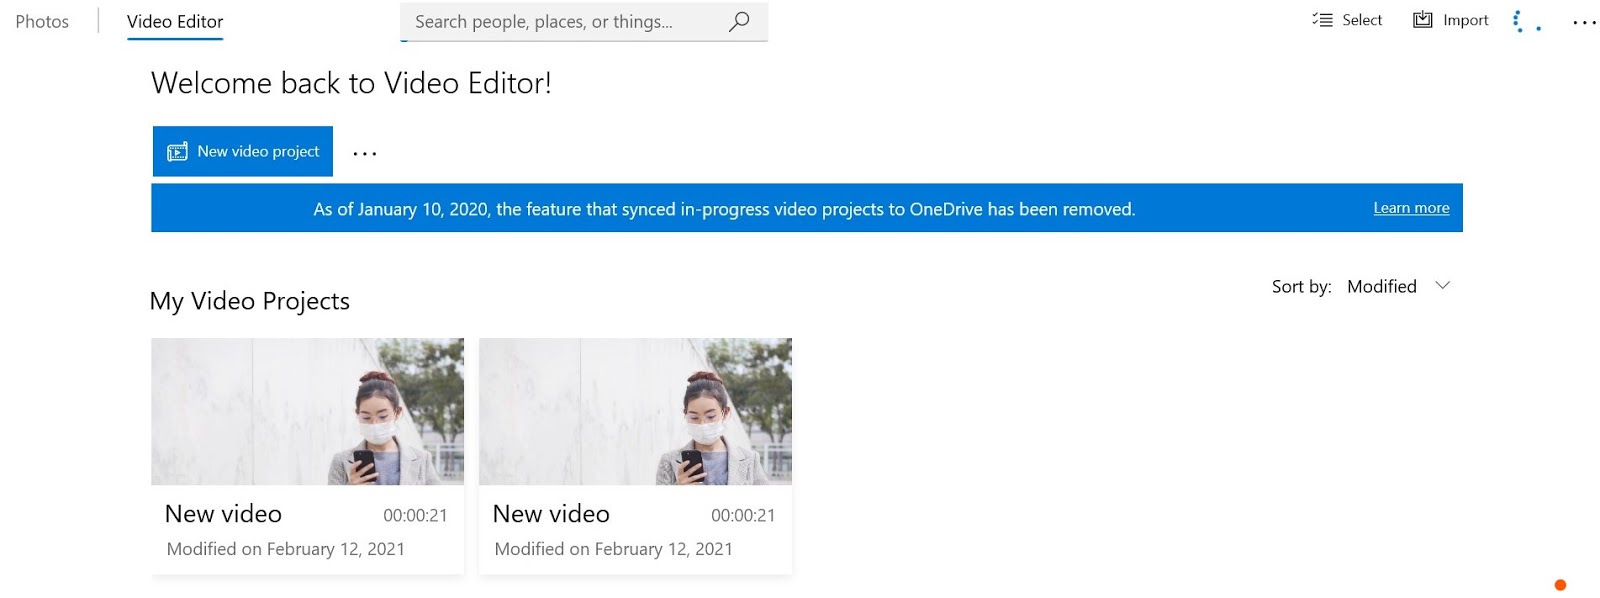
If you want to merge different video files into one and you're a Windows user, the built-in Photos app can help you get the job done. Here's what you need to do:
To split your AVI file into parts, we recommend Keevi Video Cutter. It'll allow you to cut your AVI videos with zero reduction in the quality of the output. The process for using this tool is quite simple. Just follow the tutorial below:
For Windows users, you can split an AVI into parts without a third-party tool by using the in-built Photos application and following this step-by-step guide.
You might not be able to hire a professional to create and edit your videos, but that shouldn't stop you from creating high-quality video content. The following tips can help you take your video editing abilities to the next level.
1. Always work with a plan
Before you begin shooting or editing, make sure you have a plan for your story. Know the story you want to tell and how you want to tell it. Write a script. Build a storyboard. Create a mental picture of what the end product is going to look like.
2. Keep your media files organized
You don't want to run around looking for where you stored your video files when you need to work on them. Arrange your media in folders to make them easy to find.
3. Choose a good video editing software
The right video editing software can help you make the most of your content and ensure your videos are engaging. If you don't have a lot of experience with video editing, go with a simple tool like Keevi that doesn't have a learning curve.
4. Trim the excess
Keep your videos clean by trimming the beginning and end so you don't have unnecessary scenes preceding or following the main action. Remember that your audience doesn’t have a lot of time on their hands, so avoid wasting it.
5. Go easy on the effects
Effects can be fun, but they can also make your videos look unprofessional and tacky when used in excess. Only use them when necessary and when they're sure to elevate your video.
See what world-renowned entrepreneurs, media professionals, and marketers have to say.
The average person will spend over 100 minutes watching online videos every day in 2021 — a 19% rise from daily viewing minutes in 2019.
Online videos will make up more than 82% of all consumer internet traffic by 2022 — 15% higher than it was in 2017.
6 out of 10 people would rather watch online videos than television.
Social media posts with video have 48% more views.
Seventy-four percent of marketers say video has a better return on investment than static imagery.
Viewers retain 95% of a message when they watch it in a video, compared to 10% when reading it in text.
Ninety-three percent of businesses earned new customers from a video on social media.
Social video generates 1200% more shares than text and image content combined.
When asked how they’d most like to learn about a product or service, 69% said they’d rather watch a short video than read a post, view an infographic, take a demo, or attend a webinar.
The rich text element allows you to create and format headings, paragraphs, blockquotes, images, and video all in one place instead of having to add and format them individually. Just double-click and easily create content.
A rich text element can be used with static or dynamic content. For static content, just drop it into any page and begin editing. For dynamic content, add a rich text field to any collection and then connect a rich text element to that field in the settings panel. Voila!
Headings, paragraphs, blockquotes, figures, images, and figure captions can all be styled after a class is added to the rich text element using the "When inside of" nested selector system.
The GIF Captioner is not the only tool Keevi has to offer. You can spice up your content by using Keevi to:
