
Our free online audio trimmer is one of the most practical and helpful tools you can have for your content creation.
You easily get rid of parts of audio you do not want and share it with your audience, use it on your video, or merge it with another audio.
You can create snippets of upcoming podcasts and share them on your social media to generate anticipation in your audience.
You could also take a large speech and trim it into smaller parts that you can use as podcast episodes or repurpose videos for YouTube.
Keevi’s audio cutter lets you crop audio easily and in a few minutes, even with limited content editing skills. And it’s all possible without making time-consuming software downloads.

Keevi’s powerful and flexible online audio cutter does not limit the audio file formats you can edit. You can upload an MP3 file, WAV, WMA, AAC, OGG, and many more. You also get the option to strip audio from a video and then split it to suit your needs.
You can create a video from the edited audio by adding a background image or a video from our in-built stock library.
We will show you how to edit audio online using Keevi in 3 quick steps. For instance, if you have ten-minute audio, you can split the first five or the last five minutes. Or you could separate from the 4th minute to the 7th minute and keep the rest of the audio.
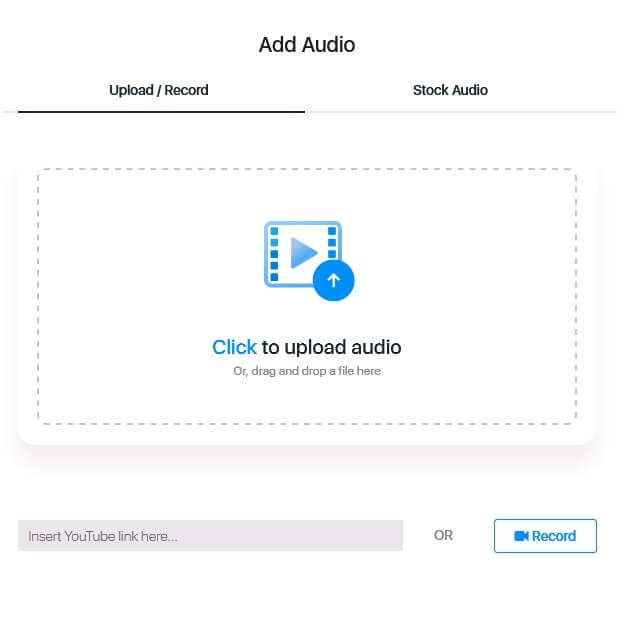
In the upload panel, tap “Click” to get your audio from your computer. For audio in a YouTube video, insert its URL in the space provided, and Keevi will extract the audio in the video and upload it to the studio. Quite convenient, right?
If you don’t have an audio ready, use Keevi’s in-built recorder to create one, or choose from the thousands of royalty-free audios in Keevi’s stock library.
You can also upload a video and later strip the audio with a single click.
Part one
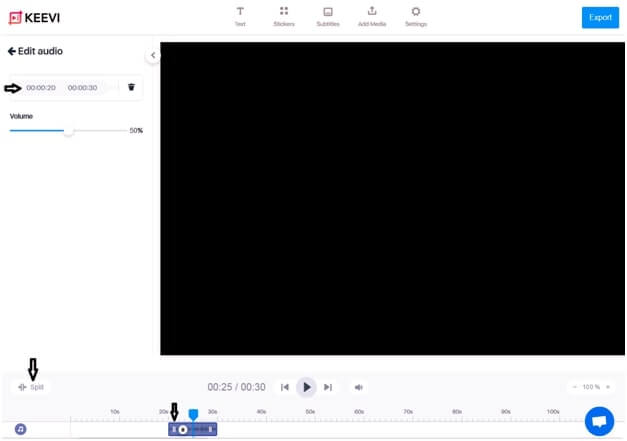
If you uploaded audio, split it by adjusting the start and end times on the panel. For instance, if you want the 20 to 30-second part of the audio, change the start time to 20 seconds and the end time to 30 seconds. The rest of the audio will be deleted.
You can also use trim audio using the “Split” function. Highlight the sub-track by selecting it. If you want to keep only the first 20 seconds, place the blue pointer on the 20-second mark and click split.
You could also cut audio using the drag-and-drop method. Do you want to reduce your audio to only the 20 to 30 second part? Click on the white handle that looks like a pause button. Drag it from the beginning of the sub-track towards the 20-second mark. Then click the handle on the other end and drag to the 30-second mark.
Play the audio to ensure that you have cut out all the unwanted parts, then move to step 3.
Part two
If you uploaded a video, you need to strip the audio first.
Click “Audio” and select “Separate Audio.” Keevi will extract the audio from the video and add it to the timeline.
Go to the steps in part one to clip audio.
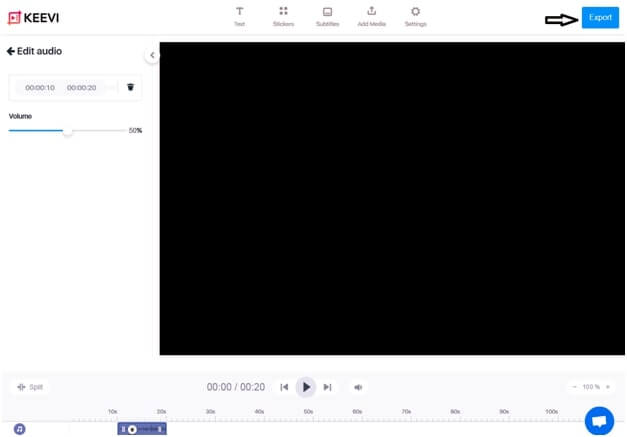
Hit Export and Keevi will render the trimmed audio in a few seconds.
Download in MP3 format or any other file format. You can also share it directly on social media.

You can trim a music file with our free web-based song cutter. Simply:
Yes. You can trim your audio by uploading it to our free online audio trimmer. No software downloads are needed.
Keevi’s audio clipper lets you upload your audio to the online studio. You can then cut audio using either of three methods—adjusting the start and end times, trimming the edges, or using the “Split” function. Once you are happy with the edited audio, download it on your PC or share it directly on social media.
You can use our free audio trimmer online to edit an audio file in MP3 file, WAV, WMA, AAC, OGG, and many other file formats. And you can also download it in a file format of your choice.
Over 100 million U.S. podcast listeners by 2024 will rise from 75.9 million in 2020. With this predicted increase, you can tap into this market by creating podcast content. Use Keevi to strip the audios from your videos and split them into short podcasts for your audience.
With over 2 billion logged-in users every month watching over a billion hours of video daily, YouTube is another major distribution channel that is sure to expand your audience significantly. Use Keevi to repurpose your long audios into short videos by splitting the audio and adding an image or stock video to each part.
Increasing the distribution channels for your content will increase brand awareness and build your market.
Before hitting “Export,” you can create a video out of your edited audio by adding an image or video. You could use one of the stock videos and images in Keevi’s in-built library.
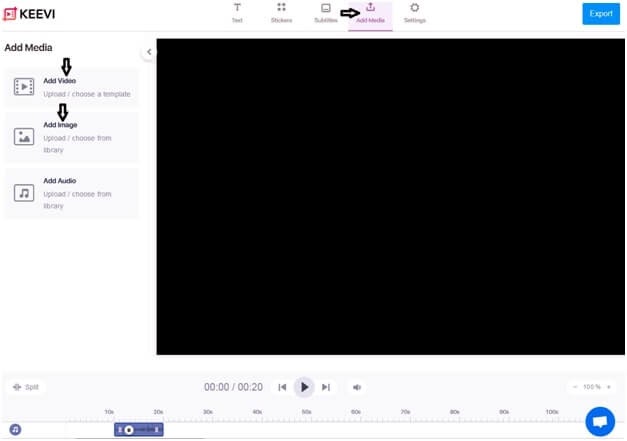
Hit “Export,” and Keevi will make your video available for download. You can push it directly to YouTube or social media.
You can also:
Adjust volume - Make audio louder or softer by adjusting its volume. Click on the audio’s sub-track and change the panel.
The rich text element allows you to create and format headings, paragraphs, blockquotes, images, and video all in one place instead of having to add and format them individually. Just double-click and easily create content.
A rich text element can be used with static or dynamic content. For static content, just drop it into any page and begin editing. For dynamic content, add a rich text field to any collection and then connect a rich text element to that field in the settings panel. Voila!
Headings, paragraphs, blockquotes, figures, images, and figure captions can all be styled after a class is added to the rich text element using the "When inside of" nested selector system.
The GIF Captioner is not the only tool Keevi has to offer. You can spice up your content by using Keevi to:
